This article describes how to create and manage additional logins for your hosting control panel. This can be handy when you need to give your developer access, but don't wish them to have your master login details.
Firstly, log into your account on our website.
Select Products then Web Hosting, then click View Details next to the account you wish to amend.
Now click the Login To Plesk link from your control panel (orange button).
Next click on the Users tab on the right. Here you will see any existing users including your master login, defined as the 'owner,' which has full permissions.
Customising Roles
Often the pre-defined roles don't give the exact set of permissions you may want to assign a user, if this is the case click on User Roles
You can edit one of the predefined roles by clicking on it OR select Create User Role to create a new role.
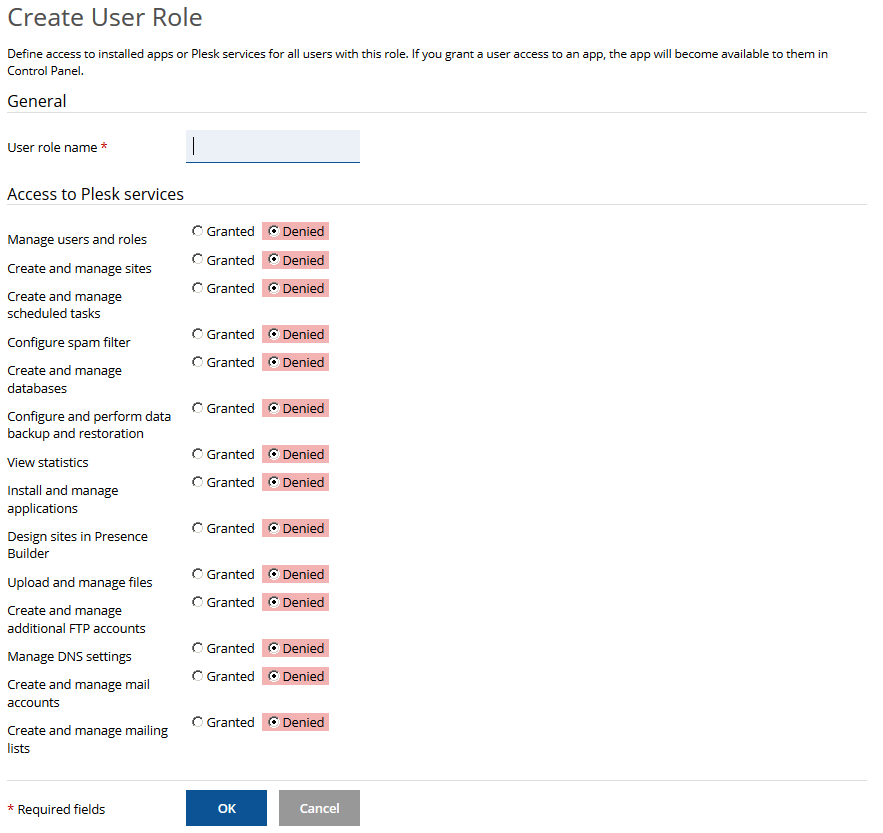
Give the role a name if you are creating a new role.
Next, enable the permissions you would like that user to have access to. For example, you may only give them permission to edit DNS records or only modify database or email settings. The settings can be edited at any time but only by users with the 'Manage users and roles' permission.
Once you have made your selection, click OK down the bottom to save your role.

Creating Users
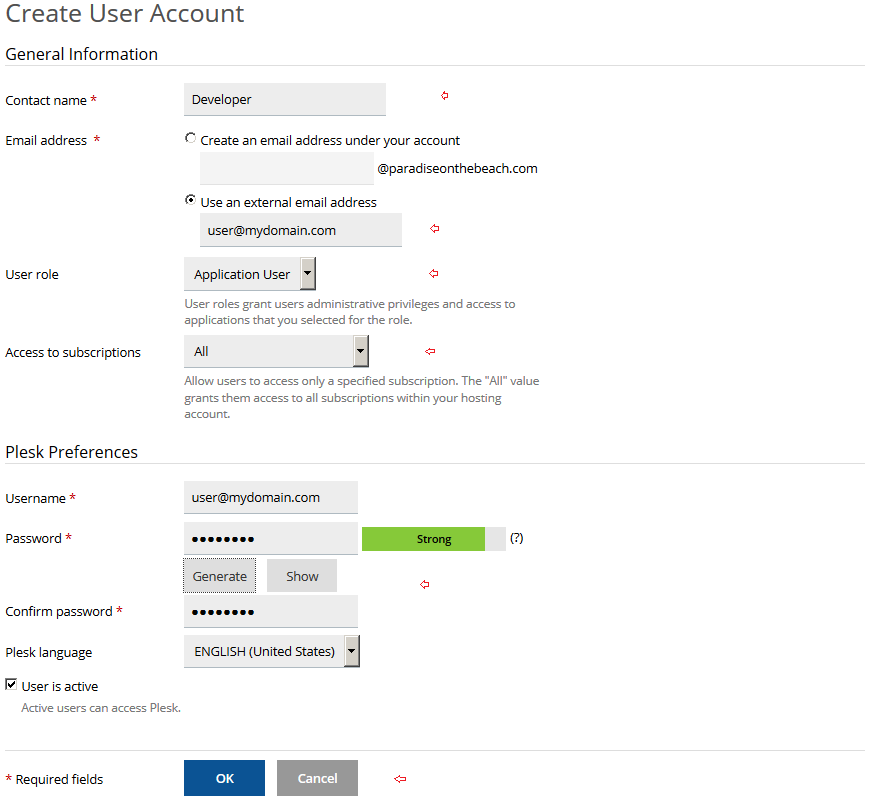
Click on User Accounts and then select Create User Account.
You will now be asked to enter a name for the person.
Next, select the check box Use an external email address and enter an email address in the box below. This will serve as their username for login. It has to be in the format of an email address, but doesn't actually have to be a working email address.
Under Role, select the role you wish to assign them which defines their permissions. See the section above about User Roles if you want to adjust their permissions.
Access to subscriptions - this defines which subscriptions they can access. Currently you can give them access to all subscriptions in your account or a specific one. Note: It's not possible to select 3 out of 5 subscriptions, it's either one or all at this point.
Scroll down to password and either click the Generate and then view buttons to have the server create a random password for you, or alternatively type in your own password and then enter it again in the Confirm Password box further down.
Click OK and the user is created.
Make a note of your control panel login URL. This can be seen in the address line of your browser at the top of the screen. Copy everything to the left of, and including :8443. If you load that, your browser will give you a login page, then enter your new user and password to login. Don't forget to log out first if you wish to test the new login details!