WordPress Toolkit is a feature-rich management interface that allows anyone to install, update, configure, clone and manage WordPress websites.
Before doing any updates it is strongly recommended to back up your website using the Plesk Backup and Restore tool. Follow this link to the knowledgebase article explaining how to do so.
Follow these steps to log into your hosting control panel.
1. Log in to the Client Area
2. Click on Products
3. Under Categories select Web Hosting
4. Click View Details next to the account you wish to manage
5. Click Manage / Login To Plesk
6. Once you are logged in, you will be taken to your plesk home page which contains tools to perform many common hosting tasks
7. On the right side menu click on WordPress
8. If your WordPress installation needs updating, you will see the corresponding messages in the Status section (for example, “Install plugin updates”)
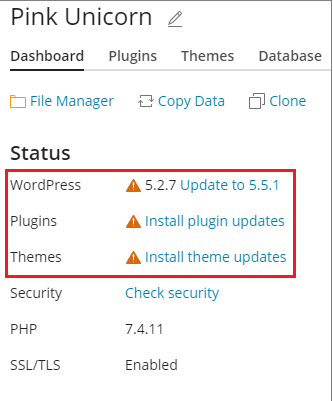
8. Click any message about available updates, wait for WP Toolkit to load the list of available updates, and then select the updates you want to install.
Note: If an update of a WordPress core is available, you will see the Restore Point checkbox. Keep this checkbox selected to create a restore point you can use to roll back the update if something goes wrong.
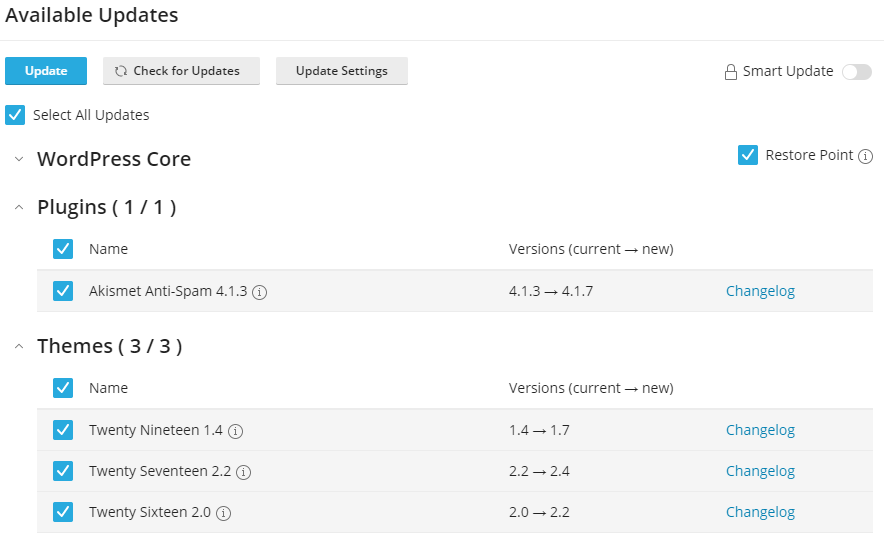
9. Click Update
The selected updates will be applied
